
Everyone has seen that movie scene where a character finds a notebook and shades a sheet of paper with a pencil to reveal the hidden text from the previous missing page.

This artisanal method works because such notes have relief. By shading with a pencil, you make the indented hidden text visible. But today we will dive into a modern forensic non-destructive technique for examination of surface relief: 3D reconstruction.
How 3D reconstruction works
To create a 3D reconstruction model, it is essential to use a multifunctional forensic device equipped with various light sources. This device, known as a video spectral comparator, includes specialized sources crucial for accurately recreating the relief of an object.
The process itself involves taking a series of pictures using these specialized light sources from different directions. Then the software, Regula Forensic Studio (RFS), makes calculations to form a 3D representation of the object's surface.
As this technology relies on how light reflects off an object and reaches the camera when the object is exposed to light, the RFS software measures the brightness of each point (pixel) from each angle. The brightness of a point determines the shape of the object. The brighter the point is, the higher the part is, and vice versa: the darker the point is, the flatter or more depressed this part is in reality.
For accurate results, at least three light sources should be used, positioned evenly around the object's surface: at 90°, 210°, and 330° (or 120° apart). Adding more points to capture makes the 3D model more detailed, but takes much more time. From our experience, a deviation of about 20% is usually insignificant for the outcome.

Such a test object is supplied with every Regula video spectral comparator. If the central part of the text object in the third image looks convex to you, make a screenshot and rotate it. It’s an optical illusion.
The RFS software has three modes of representation of the 3D model:
-
Original mode corresponds to the original coloring of the object.
-
Surface mode removes the color of the image for a clear representation of the relief.
- Height palette mode changes colors according to the relative height of the surface from the lowest point (blue) to the highest point (red).

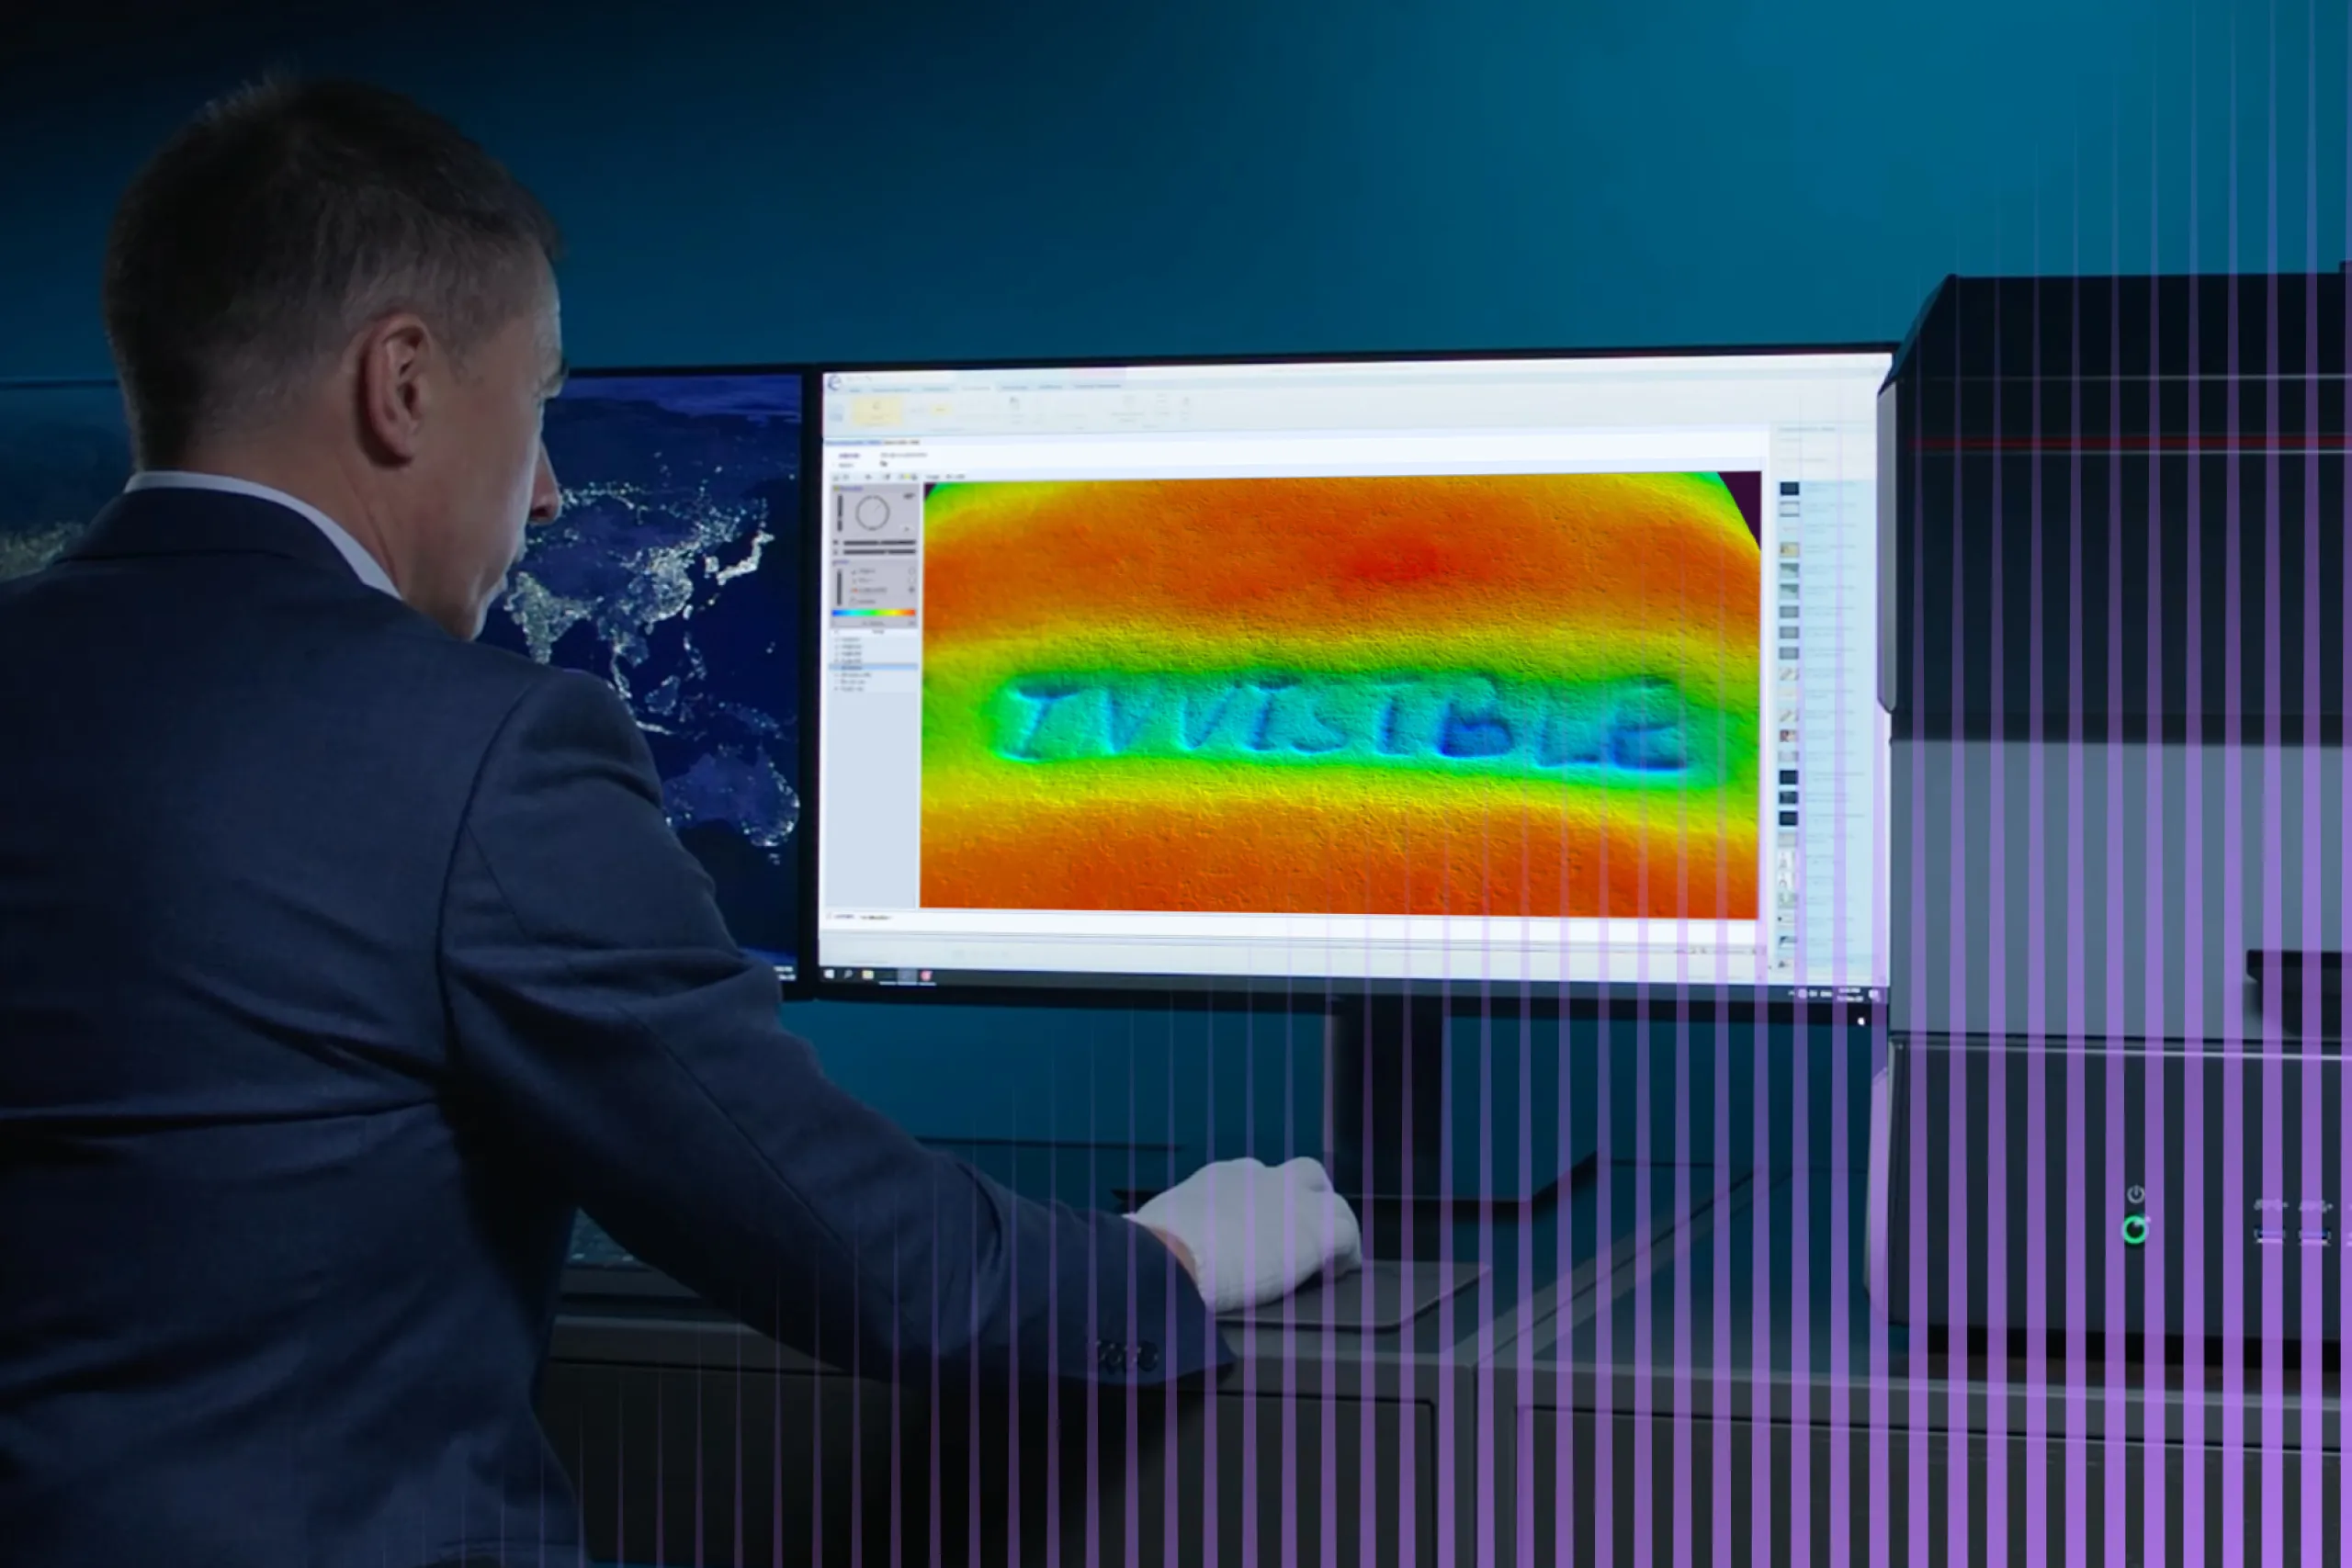
Before moving forward, let’s come back to the image where we visualized the phrase “SEE THE INVISIBLE” using pencil shading. Now let’s do a visualization using the Regula 4306 video spectral comparator to create a 3D model of the phrase.

The colorless surface mode is redundant in this case as the phrase is inkless and does not contain color. The third image is the inverse of the second image. In some cases, inversion can give a clearer representation of the surface relief by making it convex.
Get posts like this in your inbox with the bi-weekly Regula Blog Digest!
What problems does 3D reconstruction solve?
There are two common use cases in which 3D reconstruction comes in handy: blank paper frauds, and determining the sequence of strokes.
Blank paper fraud
There are cases when a person puts a signature on a blank sheet of paper, but text is added later as part of a fraud. Or, for example, in some countries, a person must sign a report as proof that that document was made by that particular person. Such reports do not have a special place for a signature (usually it is signed at the bottom of the page). After a signature is added, another person may print something else that will seem to have been approved by the signee.
Analyzing the stroke sequence with the use of 3D reconstruction can help determine whether a document contains signs of fraud or not.
Here we see two signatures that look absolutely natural. They aren’t 100% similar as they were made by hand. However, the signature in the second image was written first, and then the line and the word "SIGNATURE" were added later.
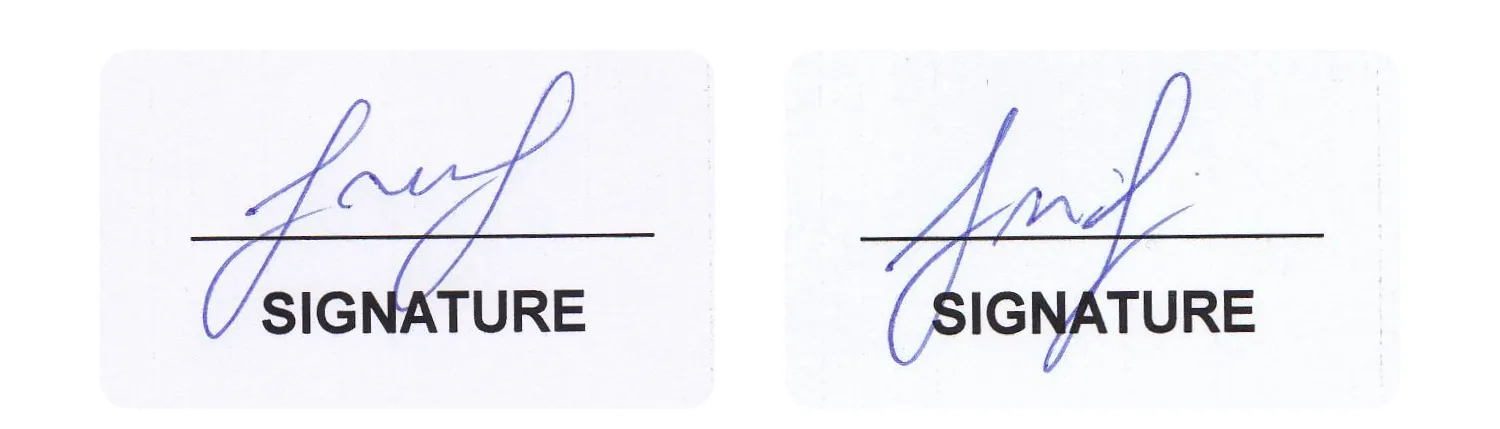
The first image represents a regular signature. The second image represents a blank paper fraud. They both seem absolutely natural to the naked eye.
Let’s start our examination with the original signature. We created a 3D reconstruction of the intersection of the handwriting and printed text in three modes. In the first image, we can’t see clearly that the pen is applied above the printing toner, but the other two images give us valid reasons to conclude that the signature was carried out in a “standard procedure” as the pen line crosses the printed line.

Examination of an original signature. In the second and third images, we clearly see the pen crosses the printing toner. There is a deep indentation.
In contrast, the signature on the blank paper fraud reveals parts where the handwriting is under the printed line. According to the height palette mode, the blue color represents the lowest parts of the 3D reconstruction. In intersecting areas, we see the blue line of the pen, and the green printed line. This indicates that the printed text was applied over the pen.

Examination of the fraud signature. In the second and third images, we clearly see that the layer of printing is applied above the line of the pen.
Two intersecting strokes
The same examination principle can be applied to cases when it is necessary to reveal whose signature was put first, and whose signature was put second. It can also detect post-handwritten paragraphs in a text.
Imagine a fraudster adds a line of text in the space between paragraphs. If there are intersections of the added text with the lower lines, we can find out that the added text appeared after the lower lines were written. This may signify that the text contains illegal additions. Here’s how it works in practice:
We choose an area where two letters or signatures overlap, and create a 3D reconstruction of the area.
In the second image, we see the line that was written above the other one. The height palette mode confirms this: the line that was put earlier is dark blue in the area of intersection, meaning it’s lower than the second line that was added afterward.

The stroke that was put later breaks the stroke that was put earlier. 3D reconstruction helps to distinguish the sequence of strokes in mere minutes.
Using Regula 3D reconstruction technology , the user can examine, analyze, and create a report that will contain images evidencing the relief of the examined object.
Read more about Regula video spectral comparators that feature a 3D reconstruction module. And don’t hesitate to contact our forensic experts to get more information about Regula devices and the technologies that power them. Subscribe to our LinkedIn group to keep up with the latest news from the forensic world.


